Sunday, October 23, 2011

Roasted chestnuts

Jack and I like to visit a particular park here in Santa Rosa around this time of year because it has three glorious chestnut trees that drop these little babies. We spend time looking for good, shiny nuts beneath the trees and maybe even pick some from the trees and husk them for our collection.


Well, yesterday we weren't alone in our chestnut gathering. A man showed up all prepared with a plastic bag to collect some too. Luckily, there were more than enough to go around. Now, onto roasting.


I've never actually roasted my own chestnuts before. The first time I ever had them was while walking the streets of Rome in winter, where they are sold in the infamous paper cones. People just drop the shells in the street. I remember wondering how all the Italian women, in their amazing high-heeled boots didn't trip on them. How do European women navigate those cobblestone streets in heels?
I've seen chestnuts roasted in a coffee roaster...those were good, but the ones in those street 'ovens' seem to do the best job.
I've found lots of simple directions for roasting these babies in the oven. I've excerpted some directions from a Smitten Kitchen recipe below.


Preheat oven to 450°F. Cut a small X on the top of each chestnut with a very sharp knife. Don’t be afraid to cut into the “meat” of the chestnut a little; I found that the the ones that were the most easy to peel start with a deep enough cut that the skin peels back while roasting. Roast chestnuts on a baking sheet for about 20 to 30 minutes, until a darker shade of brown and the X peels back to reveal the inner nut.
Cool on tray and then peel.
 I'll let you know how they turn out...

Sunday, October 9, 2011

More cute handmade costumes!

I know, I must stop! But there are so many cute ideas!

Directions here

Directions here

My son would love to be a car! Directions here

Quinoa burgers

These will definitely be on the menu the next time my sister rolls into town. They love quinoa over there in San Francisco. I have never prepared quinoa before (I know, how is this possible?) and feel that the time has come to try it once and for all. I've been eyeing some recipes for quinoa breakfast porridge and 'risotto.'

I found the recipe here, it follows below.

Quinoa burgers
1 cup uncooked quinoa
2 cups water
1/2 teaspoon salt
To cook quinoa:
In a medium saucepan bring the 2 cups water and 1/2 teaspoon salt to a boil over high heat.  Add quinoa and reduce heat to low.  Cover and cook for 18-20 minutes, or until all water is absorbed and the seeds are tender.  Allow to cool for a few minutes.
OR  2 rounded cups leftover, cooked quinoa
.
3/4 cup shredded cheddar cheese (or other variety, if you prefer)
1/2 cup low-fat cottage cheese
1 medium carrot, finely grated (OR 1 cup shredded zucchini, squeezed)
3 eggs
3 tablespoons all purpose flour
2 green onions, including white parts
1 /2 teaspoon Splenda or sugar
1/4 teaspoon black pepper
1/4 teaspoon ground cumin
1/8 teaspoon salt
1/8 teaspoon garlic powder
Olive oil for frying
.
In a large bowl combine the cooked quinoa, cheddar cheese, cottage cheese, carrot, eggs, flour, green onions, Splenda, pepper, cumin, salt, and garlic powder.
Heat a frying pan and a couple teaspoons olive oil over medium-low heat.  Measure 1/4 cup and form into patties about 1/2 inch thick  - mixture will be slightly sticky.  Fry until golden-brown, about 4 minutes on each side.   Makes approx. 10 burgers.
Per burger:  Calories 132; Protein 8 g; Fat 5 g; NET Carbs 12 g; (Fiber 2 g); Sugar 0 g; Sodium 200 mg

Saturday, October 8, 2011

Cute handmade adult mini-costumes

These are so darned cute and look so fun to make. Since I became a mom, I haven't wanted to 'really'
 dress up for Halloween, it makes sense for Jack to take center stage now, at least for a few years. The little 'hat-ettes' would be perfect and look so fun to make! For directions, click here

But last year, I made this and wore it while Trick-or-Treating around with Jack.

Nails!

source

Homemade Halloween costumes

I really enjoy making beautiful costumes to dress my son in at Halloween. I found some great ideas online for this years' creation.

Source: here

Another sweatsuit costume idea
You can buy this sew-your-own dinosaur here on Etsy.

I love this one!

Find directions for the gnome here.

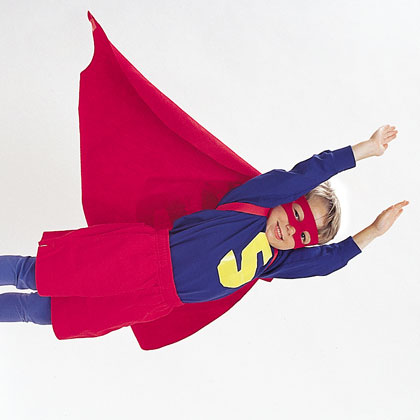
Next, the Superhero!

Directions here

This wouldn't be that complicated, if you could just find a fuzzy sweater/onesie like that to start with.

The owl costume can be purchased here

Thursday, September 22, 2011

Carrot Cake

This is my attempt at copying the cake below:

I didn't finish the edges in the same way, but I think it was still pretty. And I used Ina's recipe for Carrot and Pineapple Cake and it was seriously the best carrot cake ever. Super moist and dense. The only thing I'd change is that I'd use salted butter in the frosting, I think it needed another element. I don't like frostings that just taste sweet, you know? 

A Birthday smock


A little friend of ours was having her 2nd birthday, so I whipped up this quick smock using a pattern from Amy Karol's Bend-the Rules Sewing. I wanted to do a trial run of the pattern before making one for Christmas this year for my little man. Our friend is a very girly girl, so I chose this blue fabric with little blue roses and a wide red bias tape for the edges. It's made from one piece of fabric, but took me a surprisingly long time to make (I don't know why, but Lord knows I'm not the fastest sewer.)

I thought it came out really well, and it was rather a hit at the party (if I may say so myself.) I'm hoping to find a cool fabric for Jack's, maybe with dinosaurs on it. His smock will most likely be more of an apron, since we'll probably use it primarily for baking and making pancakes on weekends. The size given in the book (with the pattern enlarged to the suggested 235%) is about a 2T-3T and would comfortably fit most of the 2-3-year-olds that we know.

In other news, we were lucky enough to spend a morning the other day watching a family of deer eat pears beneath the tree in our front yard. Our bedroom window looks out onto the tree, so we could safely watch them without freaking them out. I gotta say, deer sure drool a lot more than I'd thought.

Friday, September 9, 2011

Kid's apron

After doing lots of baking with the wee one, I decided he is definitely due for a mommy-made apron. I searched around online and found these easy looking instructions here.

The blogger said that she'd make the apron wider next time to protect the child's pants, and I totally agree I'd do the same.

Saturday, August 20, 2011

If you have lots and lots of free time...

Just saw this awesome idea over at Craft.


It is "wallpaper" made entirely out of tiny stickers!


For more info on the project, go here.

Tuesday, August 9, 2011

Seitan Bourguignon

Saw this dish prepared on Martha today. It looks seriously deelish, something that should probably wait until the weather is a bit cooler though. Bring on autumn!

Find the recipe here.

Friday, July 22, 2011

35th Birthday

We spent my birthday (35?!) at a beautiful vacation home in Calistoga.

It was truly lovely. The swimming pool, the wrap-around porch. Not to mention a hot tub. And we made a version of a salad my sister and I had in Paris years ago. Perfectly dressed greens, couscous, fingerling potatoes, carrots and tomatoes. The real Parisian salad had goat's cheese wrapped in a crepe, cooked in butter though. Mmmm.


We chose to nix the cheese in the salad because my sister made this cake, complete with goat's cheese frosting. And goat cheese on goat cheese, I don't know....too much of a good thing, perhaps.

Saturday, June 11, 2011

Pretty cake tutorial

Isn't this rose cake just the purtiest? Find directions here

Friday, June 10, 2011

Kitchen sink quesadillas

This is a great recipe adapted from Real Simple. I've omitted many ingredients to make it a recipe I can make almost anytime from staple ingredients. If you swapped out the flour tortillas for whole wheat and used a lowfat (or polite amount of) cheese, it would be even healthier. But we like our flour tortillas and healthy amount of cheese over here.
Added bonus: It's a vegetarian dinner that my meat-eating husband loves.

Kitchen Sink Quesadillas
adapted from Real Simple

Ingredients:
flour tortillas
grated cheddar cheese
one 15 oz. can drained and rinsed black beans
one 11 oz. can corn
one cup salsa

Preparation:
Mix the beans, corn and salsa together in a bowl. Heat one side of the tortilla over medium heat in wide pan. When one side is hot, flip over and sprinkle the hot side with cheese. Top with 3 or 4 big spoonfuls of the bean and corn mixture. Top with more cheese and finally another tortilla. Let bottom tortilla get some color on it before gingerly flipping the entire thing over. Let other side brown, then slide off onto a cutting board and cut into quarters. Dip into more salsa, sour cream, or eat as is.

Thursday, June 9, 2011

Handmade memory game

What a beautiful gift for a child this would be. If only I had an extra 100 hours...

Directions for making one of these memory games here